
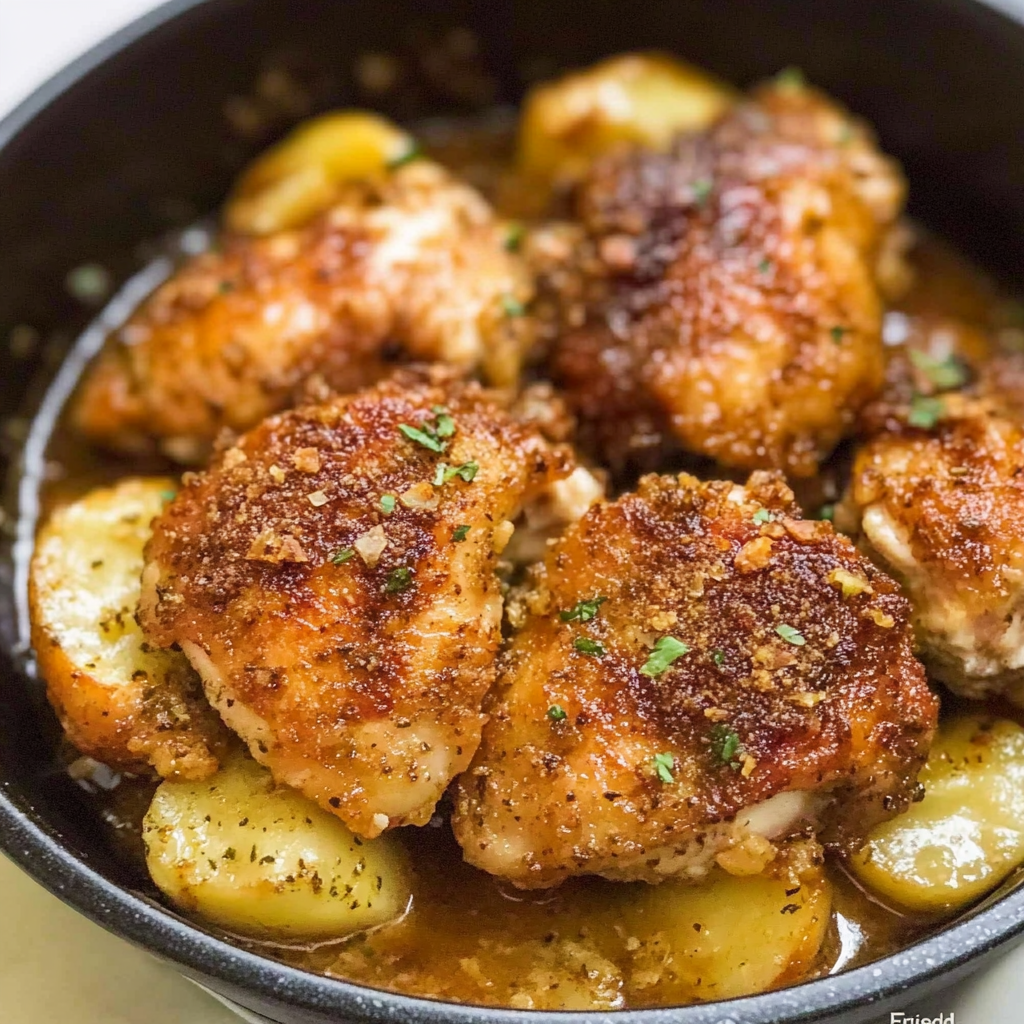
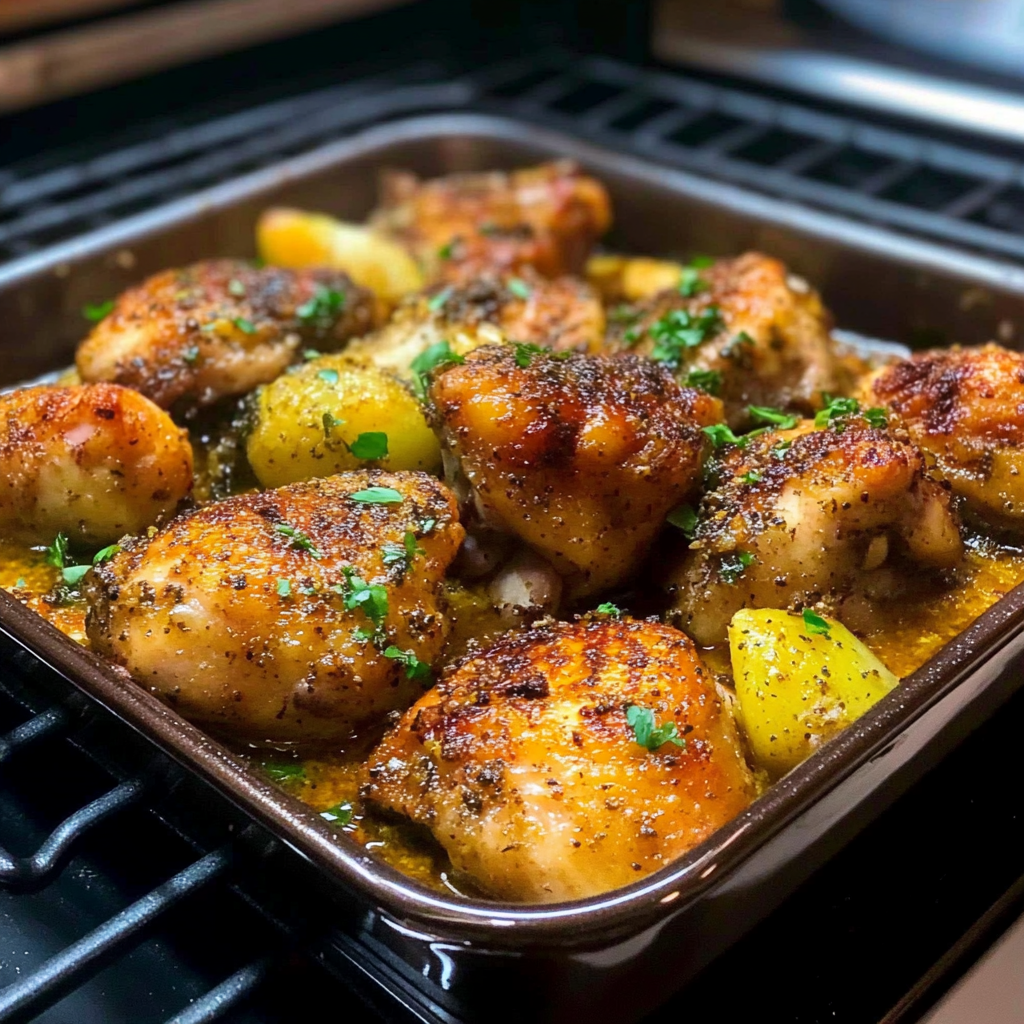
Oven-“Fried” Chicken Thighs offer a delightful twist on traditional fried chicken. Imagine biting into a piece of juicy, tender chicken with a crispy exterior—all without the guilt of frying in oil. This recipe is not only healthier but also incredibly simple to follow. You can whip up this dish in about 45 minutes, making it perfect for busy weeknights or casual gatherings with friends and family. The secret lies in the combination of spices and a clever cooking method that brings out the best flavors while ensuring a satisfying crunch. Trust me; your taste buds will thank you! Whether served with mashed potatoes or fresh veggies, these oven-“fried” thighs will quickly become a household favorite.
Why You’ll Love This Oven-“Fried” Chicken Thighs
- Quick and Easy: Minimal prep time and straightforward steps make this recipe stress-free, even for novice cooks
- Flavorful and Versatile: Enjoy outstanding flavor with ingredients you can easily customize by adding your favorites or adjusting spices
- Perfect for Any Occasion: Ideal for casual gatherings, holiday celebrations, or weeknight dinners
Ingredients for Oven-“Fried” Chicken Thighs
Here’s what you’ll need to make this delicious dish:
- Bone-in Chicken Thighs: About 4-6 thighs work well; this cut is juicy and flavorful when cooked.
- Olive Oil: Use a couple of tablespoons to help the coating adhere and achieve crispiness.
- Panko Breadcrumbs: These provide an extra crunch compared to regular breadcrumbs; they are essential for that fried texture.
- Seasoning Blend: A mix of paprika, garlic powder, onion powder, salt, and pepper elevates the flavor profile.
For the Marinade:
- Buttermilk: About one cup helps tenderize the chicken while adding moisture and flavor.
The full ingredients list, including measurements, is provided in the recipe card directly below.
How to Make Oven-“Fried” Chicken Thighs
Follow these simple steps to prepare this delicious dish:
Step 1: Prepare Marinade
In a large bowl, combine buttermilk with salt and pepper. Add the chicken thighs to the mixture and let them marinate for at least one hour in the refrigerator.
Step 2: Preheat Oven
Preheat your oven to 425°F (220°C). This high temperature helps create that desired crispy skin.
Step 3: Prepare Coating
In another bowl, mix panko breadcrumbs with your seasoning blend until evenly combined.
Step 4: Coat Chicken
Remove each thigh from the marinade and allow excess liquid to drip off. Dredge each piece in the panko mixture until fully coated.
Step 5: Arrange on Baking Sheet
Place the coated chicken thighs on a baking sheet lined with parchment paper or sprayed with nonstick cooking spray. Make sure they are spaced out properly for even cooking.
Step 6: Bake Until Golden
Bake in the preheated oven for about 30-35 minutes or until golden brown and internal temperature reaches at least 165°F (74°C). Transfer to plates and drizzle with sauce for the perfect finishing touch.
Tips and Tricks
Here are some helpful tips to ensure the best results for your dish:
- Even Cooking: Make sure all pieces of chicken are roughly equal in size for consistent cooking times.
- Temperature Control: Let ingredients reach room temperature before starting for better results.
- Crispier Finish: For an extra crunch, consider broiling them for an additional minute or two after baking.
- Marinating Time: For enhanced flavor, try marinating overnight if time permits; it makes a significant difference.
Get Inspired with Our Other Amazing Recipes
Creamy Garlic Mushroom Chicken Thighs
How to Serve Oven-“Fried” Chicken Thighs
This Oven-“Fried” Chicken Thighs is versatile and pairs wonderfully with:
- Rice or Potatoes: A hearty base that soaks up the delicious sauce.
- Fresh Salad: Adds a crisp and refreshing contrast to the rich flavors of the dish.
- Crusty Bread: Perfect for enjoying every last drop of the flavorful sauce.
Feel free to pair it with your favorite sides for a personalized meal!
The Fun Doesn’t End Here—Discover More Recipes
Crispy & Healthy: The BEST Oven-Fried Chicken Recipe
Make Ahead and Storage
- Make Ahead: You can season the chicken thighs and marinate them in the refrigerator for up to 24 hours. This enhances flavor and reduces prep time on cooking day.
- Storing: Leftover Oven-“Fried” Chicken Thighs can be stored in an airtight container in the refrigerator for up to three days. For longer storage, freeze them in a freezer-safe bag for up to three months.
- Reheating: To reheat, place the chicken thighs in an oven preheated to 350°F (175°C) for about 15-20 minutes, until heated through. This method keeps the skin crispy while warming the meat.
For More Comfort Food Delights, Click Here
Easy Slow Cooker Chicken Thighs with Rice
Suggestions for Oven-“Fried” Chicken Thighs
Choose the Right Cut of Chicken
Using chicken thighs is crucial for achieving that “fried” taste while baking. Unlike chicken breasts, thighs have more fat, which keeps them moist and flavorful. Avoid using skinless thighs as they won’t yield the same crispy texture. The skin plays a vital role in creating that satisfying crunch, so always opt for bone-in, skin-on chicken thighs. This choice not only enhances flavor but also helps lock in moisture during cooking. Ensure you check your local grocery store or butcher shop for quality options to make the most of your oven-“fried” chicken thighs.
Preheat Your Oven Properly
Preheating your oven is an essential step that many home cooks overlook. If you skip this process, you risk uneven cooking and a less crispy finish. Set your oven to the required temperature ahead of time, usually around 425°F (220°C) for optimal results. This high heat mimics traditional frying methods by creating a hot environment that crisps the skin quickly while keeping the meat juicy. Always use an oven thermometer to ensure accuracy, as an improperly heated oven can lead to disappointing results with your oven-“fried” chicken thighs.
Use a Proper Coating Technique
The coating is what gives oven-“fried” chicken thighs their signature crunch. Many people mistakenly skip the breading process or do it incorrectly. For the best results, start by seasoning your flour or breadcrumbs with spices and herbs of your choice. Dip each thigh first in flour, then in egg wash, and finally coat it with breadcrumbs or crushed cornflakes for extra crunch. Ensuring even coverage will maximize flavor and texture. This multi-step coating method creates a barrier that locks in moisture while providing that sought-after crispy exterior.
Don’t Overcrowd the Pan
One common mistake is overcrowding the baking pan, which leads to steaming rather than frying effects. When you place too many chicken thighs close together, they won’t get that nice brown color and crispy texture you’re aiming for. Instead, arrange them in a single layer with enough space between each piece to allow air circulation. This approach ensures each thigh gets even heat distribution for the best results possible when making oven-“fried” chicken thighs. If needed, use multiple pans to achieve that perfect crunch without compromising on quality.

Explore More of Our Must-Try Dishes
Crispy Air Fryer Chicken Thighs
FAQs
What sides pair well with Oven-“Fried” Chicken Thighs?
Oven-“fried” chicken thighs pair beautifully with various side dishes that complement their rich flavors and crispy texture. Classic choices include creamy coleslaw and baked macaroni and cheese for a comforting meal. You might also consider serving roasted vegetables like carrots or Brussels sprouts to add some color and nutrition to your plate. Mashed potatoes or cornbread can provide a delightful contrast in texture and taste as well. Feel free to mix and match sides based on seasonal ingredients or personal preferences to create a well-rounded meal.
How do I store leftovers from Oven-“Fried” Chicken Thighs?
Storing leftovers properly is key to maintaining the flavor of your oven-“fried” chicken thighs. Once cooled, place them in an airtight container to keep them fresh in the refrigerator. Ideally, consume leftover chicken within three days for optimal taste and safety. If you wish to store them longer, consider freezing them instead; wrap each thigh tightly in plastic wrap before placing them in a freezer-safe bag or container. Reheat gently in the oven at 350°F (175°C) to restore crispiness when you’re ready to enjoy them again.
Can I make Oven-“Fried” Chicken Thighs gluten-free?
Absolutely! Making gluten-free oven-“fried” chicken thighs is easy with just a few ingredient substitutions. Instead of regular flour, opt for gluten-free all-purpose flour or almond flour as your base coating ingredient. Use gluten-free breadcrumbs or crushed rice cereal as an alternative for added crunch if desired. Make sure all spices and seasonings are also gluten-free certified before use to avoid cross-contamination issues. With these changes, you can enjoy deliciously crispy chicken thighs without any gluten concerns.
What should I serve as a dipping sauce?
A variety of dipping sauces can elevate your oven-“fried” chicken thighs experience! A classic choice would be ranch dressing, which complements the savory flavors beautifully. Alternatively, consider honey mustard sauce for a sweet-tangy option that’s incredibly popular among both kids and adults alike! Barbecue sauce offers another fantastic choice if you’re looking for something smoky and bold in flavor; it pairs perfectly with crispy-skinned chicken! Feel free to experiment with different sauces based on personal taste preferences; there are no limits!
Ready for Another Flavor Explosion?
Crispy Panko Baked Cod
Conclusion for Oven-“Fried” Chicken Thighs
In conclusion, making delicious oven-“fried” chicken thighs requires careful attention to detail throughout each step of preparation and cooking processes. Choose bone-in, skin-on thighs for maximum flavor; always preheat your oven properly; utilize effective coating techniques; and avoid overcrowding pans during baking—all crucial aspects leading towards achieving crispy perfection! Don’t forget about complementary sides or delectable dipping sauces that further enhance this dish’s appeal—creating memorable meals is achievable! By following these guidelines diligently, you’ll surely impress family members at dinner gatherings while indulging yourself too!
Description
Oven-Fried Chicken Thighs are a deliciously healthier alternative to traditional fried chicken that delivers on flavor and crunch without the guilt.
- Marinate chicken thighs in buttermilk seasoned with salt and pepper for at least 1 hour.
- Preheat oven to 425°F (220°C).
- Combine panko breadcrumbs with seasoning blend.
- Remove chicken from marinade; dredge in breadcrumb mixture until fully coated.
- Place on a lined baking sheet, ensuring even spacing.
- Bake for 30-35 minutes until golden brown and cooked through (internal temperature of 165°F/74°C).
Notes
For extra crunch, broil for an additional minute after baking.
Feel free to customize the seasoning to suit your taste or dietary preferences.
- Prep Time: 15 minutes
- Cook Time: 30 minutes
- Category: Main
- Method: Baking
- Cuisine: American
Nutrition
- Serving Size: 1 serving
- Calories: 340
- Sugar: 0g
- Sodium: 520mg
- Fat: 20g
- Saturated Fat: 5g
- Unsaturated Fat: 14g
- Trans Fat: 0g
- Carbohydrates: 12g
- Fiber: 1g
- Protein: 30g
- Cholesterol: 120mg
Keywords: For extra crunch, broil for an additional minute after baking. Customize the seasoning as desired; try adding cayenne for heat or Italian herbs for a different flavor profile.